Showing posts with label petite petals punch. Show all posts

Tuesday, 1 April 2014

Feel Goods

Hi there I hope that today finds you all well dear readers.  Now I must make a confession, I've had the Feel Goods stamp set for some time but have never used it.  Yes I definitely need my legs slapping lol.


 I've used that fantastic accordion die again (it's by Elizabeth craft design if you didn't see my last post with it) I love this die you can make the accordion as big as you like you don't have to stop at three like I've done, it would be fantastic if you wanted to do a big card with someones name on it.
I've punch out some of the petite petals from the water colour wonder for both ends of the card, the little middles are a tiny scalloped circle that comes in the itty bitty punch pack and I just popped a gem in the middle.
Then of course the middle is one of the quotes from the feel good stamp set, I've inked the edges of all the whisper white card with a bit of calypso coral ink.

Hope you like today's card, if you would like any of the items used to make this card please click on the pictures below which will take you directly to my online shop.

Happy crafting

Deb xx
Table built using Stampin' Up! Product Table Builder from The Crafty Owl.


Wednesday, 26 February 2014

Hardwood Tutorial

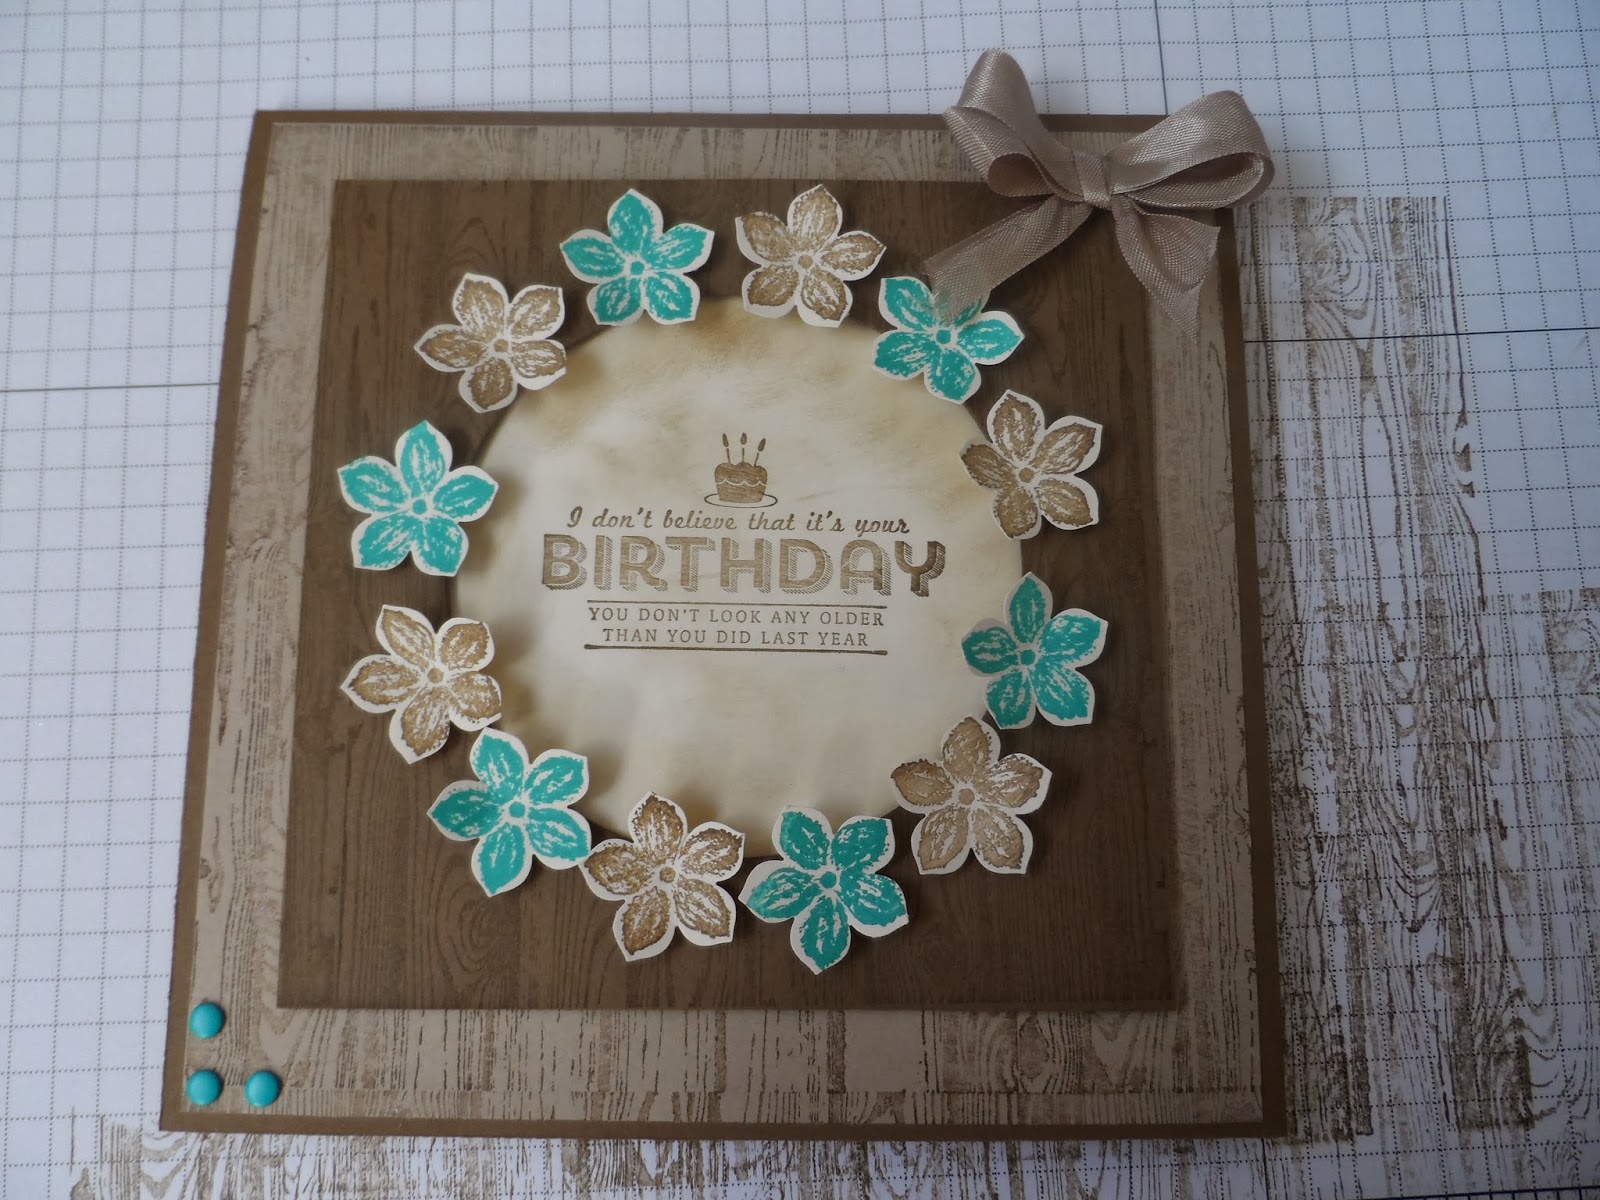
Hi there dear readers, today I have another tutorial for you this time using the hardwood stamp.  I wasn't keen on this stamp until I saw all the beautiful cards that were being made with it.  This one I got the lovely Julie Kettlewell.

So this is the card;

You will need;
Soft suede card and ink
Crumb cake card
Very Vanilla card
Bermuda Bay Ink
Crumb Cake Seam binding
Hardwood Stamp
Petite Petals stamp and punch
Candy dots in Bermuda bay,
Circle Framelets.
See ya later stamp set

Instructions

First make a base card of 6"x6" in soft suede (if you are unsure on how to do this look on my post for 24 February it explains how to do this)

Cut out two 5 3/4" x 5 3/4" Squares in crumb.  Glue one of these pieces to the inside of your card.  Stamp the other with the hardwood stamp in soft suede ink.  I used my stamp-a-ma-jig to help line it up as the card you're using is bigger than the stamp.
Then glue this layer to the front of your base card
Cut a piece of soft suede card stock measuring 4 3/4" square, stamp this in soft suede using the hardwood stamp.
Using the circle framelets cut a circle in the middle of your soft suede 4 3/4" square card.  I used the 7th circle from the middle.

Using one size bigger circle cut out a circle from very vanilla card stock. Stamp this with your sentiment, I used the See Ya Later stamp set for this which is free during sale-a-bration with any order of £45 or more.

Glue the sentiment to the middle of your card.
Add your layer of 4 3/4" square of soft suede card with foam pads

Stamp out some petite petals in soft suede and Bermuda Bay, punch these out and attach them with foam pads around the circle on your soft suede card.
Add a crumb cake bow to the top right hand corner and some candy dots to the bottom left hand corner.  I also made this one for valentines day;


If you would like any of these products please click the pictures below which will take you to my shop

Happy crafting

Deb xx


Table built using Stampin' Up! Product Table Builder from The Crafty Owl.


Monday, 24 February 2014

Flowering Flourishes Tutorial

I've had some requests from readers on how to make some of the cards I showcase on my blog.  With this in mind I'm going to try, where possible, to pop little tutorials on here so you can remake the card should you so wish.  Here is the first.

Here is the card we are going to make, it's a 6 x 6 and it uses Flowering Flourishes, Petite Petals and Teeny tiny sentiments stamp sets.

You will also need;
Crushed Curry Card
Whisper White Card
Gumball Green Ink
Crushed Curry Ink
Word Window Punch
Modern Label Punch
Petite Petals Punch
Pearls
Crushed Curry Candy dots
Paper Trimmer
Score board

Make a base card measuring 6" x 6", you can make this from A4 card by cutting one piece of card 6"x8"

Score this card on the long side at 2"
Fold along the score line
Then cut a piece measuring 6"x6".  Glue this to the flap of your 6"x8" piece of card and you'll have your 6"x6" card base.
Cut two pieces of whisper white card measuring 5 3/4" x 5 3/4"
Glue one of these to the inside of your base card
On the second square of whisper white card stamp out the large and medium Flourishes corner to corner in gumball green.
On a separate piece of whisper white stamp out five petite petals in crushed curry and punch these out using the petite petals punch.
Using foam pads add these along your flourishes, add a few pearls to the centre of your petite petals and along some of the flourishes as shown above.
Stamp out the sentiment using the Teeny Tiny sentiments stamp and punch out using the word window, punch out a modern label in crushed curry and glue your sentiment to this.
Place the sentiment using foam pads to the bottom right of your card.  To the top left hand corner add 3 candy dots, then stick the whole thing to the front of your base card.

I hope you found this helpful,  all products are listed below if you would like to purchase any of them just click the picture and it will take you directly to my shop.

Happy crafting

Deb xxx

Table built using Stampin' Up! Product Table Builder from The Crafty Owl.